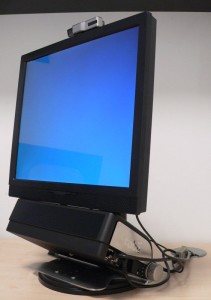
Our Tobii X60 setup at SimpleUsability
 When upgrading our Tobii 1750 last year we had to decide between buying an integrated eye tracker such as the T60 or a standalone unit like the X60. Whilst most of our web usability research at SimpleUsability is still carried out on a 17 inch 1024 x 768 display, we’ve increasingly needed to use larger HD displays for print and packaging research. So having a standalone unit which we sat infront of different screens seemed the best option.
The main drawback with the remote eye trackers is when the research participant moves the screen to their prefered distance (as they regularly do in sessions). Because the tracker is not physically attached to the screen, you need to take accurate measurements again so that the software knows where the tracker is in relation to the screen. Taking the measurements is easy – it’s just not conducive to relaxing the user at the begining of a session.
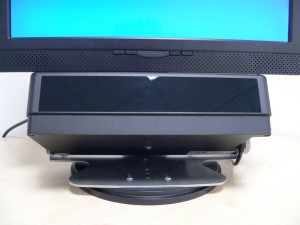
To get around this, we put together a setup that’s easy to unpack and run, without having to measure and the users can move things, and the facilitator can adjust the movements to ensure the screen and Tobii X60 are still aligned. The X60 sits on the monitor stand, so you are free to move the whole unit back and forth to meet the preference of the user. All of the kit goes in a flight case. Setting up just involves lifting the screen to maximum stand height and then placing the X60 underneath so that it’s flush with the bottom of the screen. Just for peace of mind, we use the angle finder iPhone app to make sure the X60 angle is set correctly.
 We’ve been asked a few times about our setup – so here are a few photos and notes.
We chose the Iyama P1705S 17 LCD Hard Glass Monitor with adjustable stand. Be careful when ordering, because you need to ensure you’re getting the one with the adjustable stand. The glass screen means we can easily clean off fingerprints and pen marks left by participants.
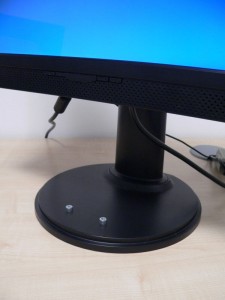
The only modification we made to the stand was to drill two holes to place two socket cap screws for the Tobii X60 to locate on. If you take the metal plate off the base of the stand, there’s room for nuts to hold the bolts in place. I think I spent 3 hours measuring, checking, re-measuring, drawing datum lines, measuring again etc…. then drilling two holes carefully with a pillar drill. Ideally, you want the bolt heads to be in a line parallel to the VESA plate/screen so that the Tobii X60 is central. If you do get it wrong, you can just take measurements to reflect any offset – but having it all central and lined up is best.
 The other modification we’ve done is place black vinyl over the logos on both the screen and tracker and led light at the front of the screen, so that there’s no distractions to the user and no “we’re eye tracking you” label on the X60.
If you are planning to copy our setup with a larger monitor, you need to be aware of the angles/range of the tracker. Larger wide screens will mean that the X60 has to be further in front of the monitor to ensure it can track at the extremities of the screen.